How to Drape a Saree: A Step-by-Step Beginner's Guide
The classic Nivi drape, broken into four simple, repeatable steps — tuck, pleat, pallu and pin. Follow along and you will have a neat, confident drape by your third try.
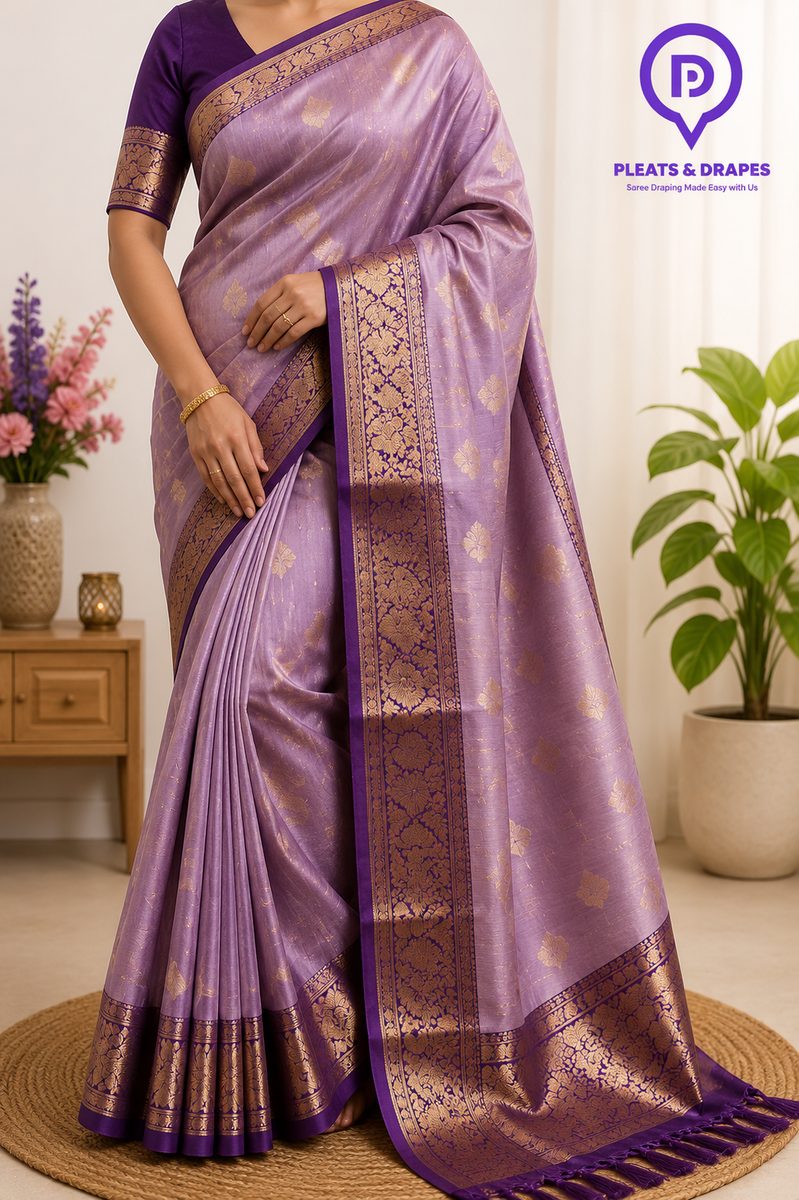
What you need & how it works
The Nivi drape from Andhra Pradesh and Telangana is the most widely worn style in India, and it is the perfect one to learn first. A saree is a single piece of unstitched cloth, usually five and a half to six metres long. All its elegance comes from three things done well: an even tuck, neat pleats and a pallu that falls just right.
Before you start, wear a fitted petticoat and a well-fitted blouse, and choose footwear of the height you intend to wear — this sets the length so the border grazes the floor without dragging. Keep four or five safety pins within reach and stand in front of a full-length mirror. If your pleats are already prepared through our saree pre-pleating service, you can skip straight to draping and finish in a fraction of the time.
Draping a saree, step by step
Tuck the plain end at the waist
Take the plain inner end (the end without the pallu) and tuck it into your petticoat at the navel, a little to the right of centre. Carry the saree once around your waist, from right to left, and tuck it in all the way round. Keep the lower border level with the floor as you go — this first round decides the whole length, so take your time here.
Make even waist pleats
From the free-flowing fabric, gather 5 to 7 pleats, each about five inches wide. Fold them accordion-style over your fingers, keeping the lower edges perfectly level. Pinch the top together, turn the pleats slightly to the left, and tuck them firmly into the petticoat at the navel so they open into a clean fan. Equal width is everything — uneven pleats are the single biggest giveaway of a rushed drape.
Take the pallu over the shoulder
Wrap the remaining fabric once more around your waist to the front. Now lift the decorated end — the pallu — and drape it diagonally across your body, from the right hip up to the left shoulder. Let it fall behind the shoulder to around knee length. You can leave it loose and flowing, or make two or three neat lengthwise pleats in the pallu for a tidier, more formal finish.
Pin, adjust and check
Secure the pallu to the shoulder of your blouse with a safety pin placed from underneath so it stays hidden. Add one small pin to hold the waist pleats together. Smooth the front, straighten the fan of pleats, and check the fall in a full-length mirror. Walk a few steps — the border should skim the floor and the pallu should sit flat without slipping.
Beginner tips that make a difference
- Wear your event footwear while draping so the length is exactly right.
- A snug petticoat is your anchor — a loose drawstring lets the whole drape sag.
- Practise on a cotton saree first before moving to slippery silks.
- Pin from underneath so pins never show on the outside.
Common mistakes beginners make
- Uneven pleats — vary the width and the fan looks messy. Measure with your fingers each time.
- Wrong length — tucking too high leaves the border above the ankle; too low and you trip.
- A slipping pallu — skipping the shoulder pin means constant re-adjusting all evening.
- Rushing the first tuck — the very first round sets everything, so never hurry it.
How long does it really take?
When you are learning, plan for 20 to 30 minutes — most of that time goes into getting the pleats even. It feels slow at first, and that is completely normal. By your fourth or fifth attempt the muscle memory sets in and the whole drape comes together far more quickly.
The real shortcut is preparation. When the pleats are already formed and pressed in advance, draping becomes almost effortless — you simply tuck, wrap and pin. That is exactly why so many working women and brides choose ready pleats.
Approximate timings
- Complete beginner: 20–30 minutes
- With practice: about 10 minutes
- With pre-set pleats: 5 minutes
Want to try a different look once you have the basics? Explore our guide to saree draping styles.
Learn hands-on, or let us drape it
Reading is a great start, but nothing beats guided practice. Join a small-group session at our draping workshop to master pleats and the pallu with an expert beside you — or book our professional saree draping service and step out flawless for your next occasion. Short on time on the morning? A ready-to-wear saree takes minutes.
Saree draping questions
Want a perfect drape for your next event?
Message us your saree type and event date on WhatsApp — we will pre-pleat and drape it so you step out flawless.